Common Husqvarna Viking sewing machine problems
Some tips for problems experienced when using the Husqvarna Viking sewing machines.
- Needle breaks or twisted – replace needle.
- Changing needle thread to new thread, replacing thread plate, bobby-repair.
- Fabric not feeding – check the feed dog is in the seat up, and increase the stitch length.
- Skipped stitches – check a broken needle, change to the appropriate needle for fabrics and thread a new top and bobbin.
- Thread cutter not working – Remove the bobbins and clean areas and turn the cutter on.
- The machine will not sew – checked foot controls connection placed the bobbin winder in the left positions.
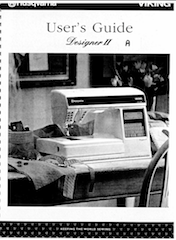
You can download the manual below in our Payhip store:
Husqvarna Viking sewing machine keeps jamming
The first thing you should do is shut it off and unplug the machine. Rotate the handwheel in two directions to see if the machinery is freed up. If the needle bends then this will again be the cause of that problem. If you have bent needles you will have to verify they are bent and replace that if possible. Your fabric might cause this.
Husqvarna sewing machine won’t Zigzag
In this case you should check the owner handbook to find the appropriate stitch setting for this style of stitching. In order for that stitch to be functional, you must reset its length and width. You might just want to wash the waste area. Afterwards, you may need to oil the machine parts to ensure they move freely and follow the instructions. Now check the timing and the tension. If the time is not accurate then the thread can’t get around it won’t sew your fabric. Or your tension’s too tight.
Check your presser foot is behaving itself!
Husqvarna Tension Problem
One explanation for this problem is that you were not cleaning your machine and removing dirt, loose threads and fibers gained access to your tension spring. The bobbin could be wrapped too tightly or loosely; you may have inconsistent tension. If the tension settings aren’t balanced correctly you need to compensate for the tension on the needle and adjust it out. If thread tension is too tight you can loosen thread tension and then confirm thread tension and top knot.
Husqvarna foot pedal not working
Check the cord to ensure there are no cuts in the cord, loose or broken wires. It would be unlikely that the cables have been broken. Unplug it and return to plug to verify this proposition. If you don’t plug your foot pedal in, your pedals can never get power. But after looking at the pedal it may not necessarily be the problem. A replacement foot pedal can be purchased if the cord breaks you need to book in for a sewing machine repair job so this is a visit to your local repair shop and get some help from your Husqvarna machine technician.
How do I take apart a Husqvarna sewing machine?
Removing covers from Husqvarna machine may not have the same way. To remove the cover of the 150 E you must first remove the screw on the back. Then go to front panel and there’s a screw in the rear and another hidden under the gearbox. If you have your owner manual check it and see where other screws lie. Sometimes you don’t have to take part off when it’s just a small adjustment or repair. The 150 E is supplied with a lever and shifter for removing the cover. Time to consider a visit to your local Husqvarna machine technician.
Cleaning and oiling the buttonhole unit and reverse unit will solve common problems on your Husqvarna Viking sewing machine. I use a hair dryer to loosen old oil.
You need to clean your machine and find the sticky parts. These videos should help. https://www.youtube.com/playlist?list=PL770BF19B107BD992