Paint Vintage Sewing Machine, Is it time to repaint your vintage Singer sewing machine? Read our article to see the steps involved: preparation, primer, and paint. You will need paint designed for plastics, paintbrushes, newspaper or plastic sheeting, and paint primer.
Good preparation Paint Vintage Sewing Machine
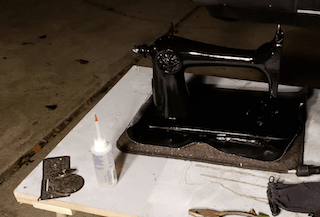
Once you have best gathered all of your supplies together, set up in an area that has good ventilation.
After setting up your workstation, Paint Vintage Sewing Machine read through your paint instructions to understand their application method. Most paints take longer than expected to dry completely. Avoid touching the paint until it has thoroughly dried overnight because otherwise, you’ll rub off some of the paint with skin oil.
Start by taping off any areas where using tape will not show later after the painting is completely done (such as on raised surfaces). Try to paint in sections and avoid painting your electrical cords. Let paint dry overnight before removing the tape.
After the paint has dried, add a top coat of paint that is more vivid than the paint beneath it. This will give you a finished result that looks professional rather than painted by hand!
Make sure to have fun with this project because any sewing machine – no matter how old or new it seems – can benefit from an exciting paint job!
What kind of paint to use?
It is important to select enamel paint for your sewing machine. There are two companies that produce great opaque one coat paints: one shot and alpha enamel. They are both paint and primer in one. these are good for touch-ups and full repaints and come in small jars.
Paint | Black Automotive Paint | Rust-Oleum Primer |
 |  |  |
 | | |
If you are doing a full repaint you can also use automotive paint.
I have heard of some people using nail enamel for touch-ups but it may be good for a short period and to highlight elements, like in gold for example.
Painting Technique
A paintbrush with stiff bristles roughly half an inch wide works best. These can be purchased from a craft store, not a hardware store! They come in different widths so work out which is the most comfortable for you to use.
The paint needs to bond well with the surface of the machine, that’s why it’s important to paint over all of it; including any grills (for fans) and crevices. Avoid using paint on machine surfaces that move like drawers or slide-out tables – rather remove these parts before painting begins entirely if possible, otherwise taping them off will suffice as long as paint seeps under the edges of the tape once dry. If taping does not work paint might seep into a moving part and damage the machine.
Be aware that paint may cause paint keys to stick while rotating, so test them afterward to make sure they rotate well. The paint that has been used in the example is plastic paint from one shot. The paint was purchased from a craft shop for about 5 dollars per 1/4 liter can. There are other brands available but this paint appears the cheapest and best option at the moment from my research on google.
A sewing machine with lots of intricate details needs several coats of paint to look good – wait for each layer to dry before attempting another layer. It’s also important to use a primer coat because many plastics have oil that doesn’t bond well with paint. That’s why paint primers are important – paint them on first before painting, let them dry for an hour or two, and then paint after that!
When the paint is fully dry you may notice small paint bubbles around your machine – don’t worry about them because they will flatten out once the top coat of paint has been applied.
As with any project, preparation makes painting simple so spend some time taping off areas of the machine where tape won’t be visible once done.
If you plan to use paint primer have this layer of paint dry prior to any other layers being applied – according to instructions for drying time which should be written onto can lids or labels on the bottom of pots of paint. If not give the paint a good hour or so before applying paint.
If paint seeps underneath paint tape don’t worry about it – when the paint is dry sand down the edges of paint tape to remove paint if desired (if you sand too much paint away stop when paint is level with the surface around it, sanding will reveal primer in places where paint has been taken away – not enough to make much difference).
When sanding do this over a cloth or rag because paint seeping into fabric might never come out (and wear gloves too to protect hands). Touch up any paint that has seeped through by painting over top again. If you want to avoid all this sanding back and forth simply use masking tape instead which doesn’t lift off paints at edges whenever paint is lifted away from a surface – so paint doesn’t seep underneath masking tape.
Be aware that paint might not be the right solution for what you want to paint! You can try chalk paint or acrylic paint mixed with plastidip which dries tacky and peelable. If your machine is made from metal you might have luck using model paint from a hobby store instead of paint meant for furniture or plastics – just don’t use acrylics on aluminum because they will corrode it! In fact, I think most paints are not suitable for aluminum but if anyone knows different feel free to let me know!
If you need any replacement decals after your paint job is complete, please check the listings below: